Haunt at Great Oak
The haunt returns October 2025
Before going any further into making a witch, you should definitely check out these three videos by Stiltbeast Studios on YouTube, since these have techiques and ideas that are used for the witches...
Head
Eyes
Body
Hands (alternative method)
Head
Eyes
Body
Hands (alternative method)
ElsBeth Lair has the video we used for our witch's hands.
Materials
Loctite foam sealant - Required
Styrofoam wig head - Optional, inner mold for sculpting heads
Spray bottle - Required
Rubber gloves - Required
Paint brush(es) - Required
Acrylic paints - Required
Heat gun - Required
3/4 inch PVC Pipe and connectors - Required
1/2 inch PVC Pipe and connectors - Required
Round glass cabochons - Required
Chicken wire - Optional
Rebar - Optional
Hot glue gun - Required
Rotary tool - Optional
Deer motor, replacement - Required, if animated
Hyco bar - Required, if animated
First and foremost, think about the end result of how you want what you will be making to look like. We spent at least a couple of weeks researching, discussing and thinking about the overall art direction for all three witches.
Cover a styrofoam wig head, or similar type of shape, with plastic wrap, a couple of layers is required to prevent sticking and/or damage to the wig head. Spray the plastic wrap with water. Spray Loctite foam sealant on the head, leaving gaps between the piped strips of foam sealant, as well as the neck area. Set a timer for three minutes and spray more water on top of the spray foam. Once the timer is complete, using hands that are damp, begin checking the foam for stickiness and the ability to be molded. As soon as the foam sealant isn't sticky to the touch and you are able to work with it, begin shaping into a complete head, including eye sockets, nose, ears, mouth, chin and neck. While you are working with it you may notice that it is starting to stiffen, which means that it is time to remove it from the wig head, or whatever was used, otherwise it will require that you cut the foam sealant in order to remove it.
While waiting for the head to set, so you will be able to work with it, you spray water into a couple of rubber gloves and then fill them with foam sealant. You will need to check them after a few minutes to determine if they are starting to set, so you will be able to shape them into your desired position.
Once the head has hardened, you can use a rotary tool, razor blade or anything else to better refine the head into what you would like the zombie's skin to be. For example, you will want to cut out where the eyes will be placed, the ears and nostrils might need to be enhanced or taken in a bit, etc.
Paint the head and hands using acrylic paints to give them the appearance that you desire. It is recommended to do a base coat of a skin tone, allow that to dry, and then proceed with layering all of the different colors individually until you have reached the top coat of paint. Using a spray bottle on wet paint allows you to create a drip effect, if desired.
Paint two cabochons to give them the appearance of being eyes. Please see the video from Stiltbeast Studios on YouTube for how to paint an eye. Once the paint on the eyes has dried, you can use a hot glue gun to attach them on the inside of the head in the eye sockets.
Determine what type of movement(s) you would like your witch(es) to make and buy a deer motor for each pivot point you would like to have. It is best to make a diagram, at least for reference, for this step.
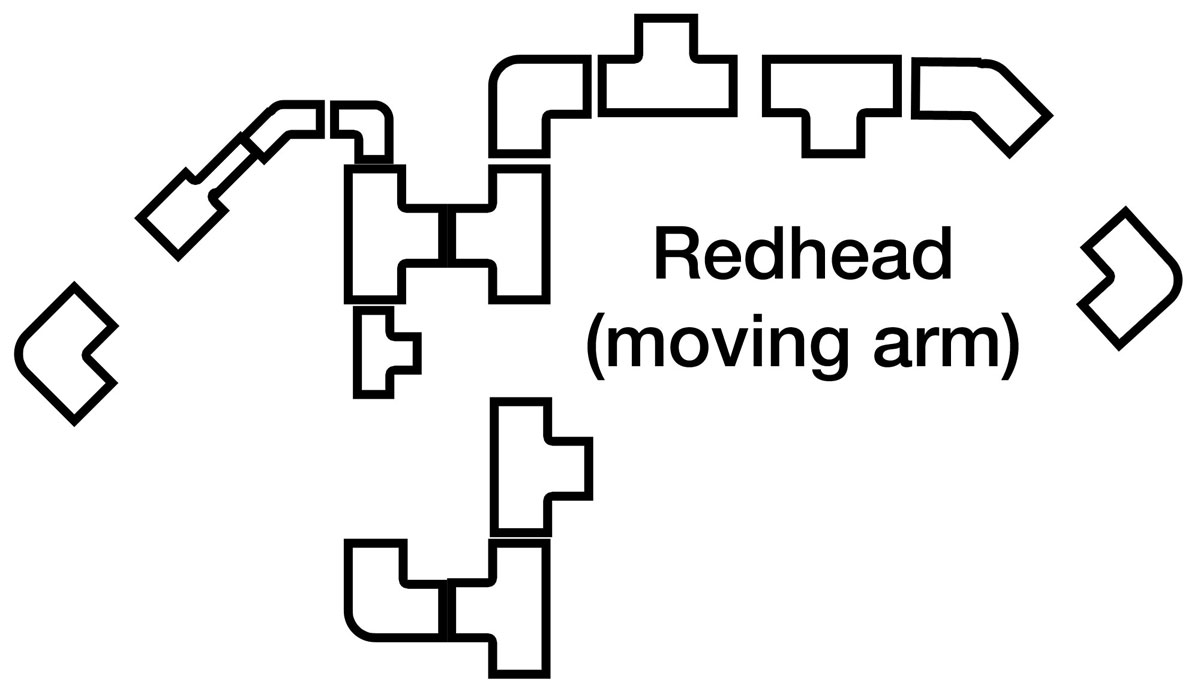
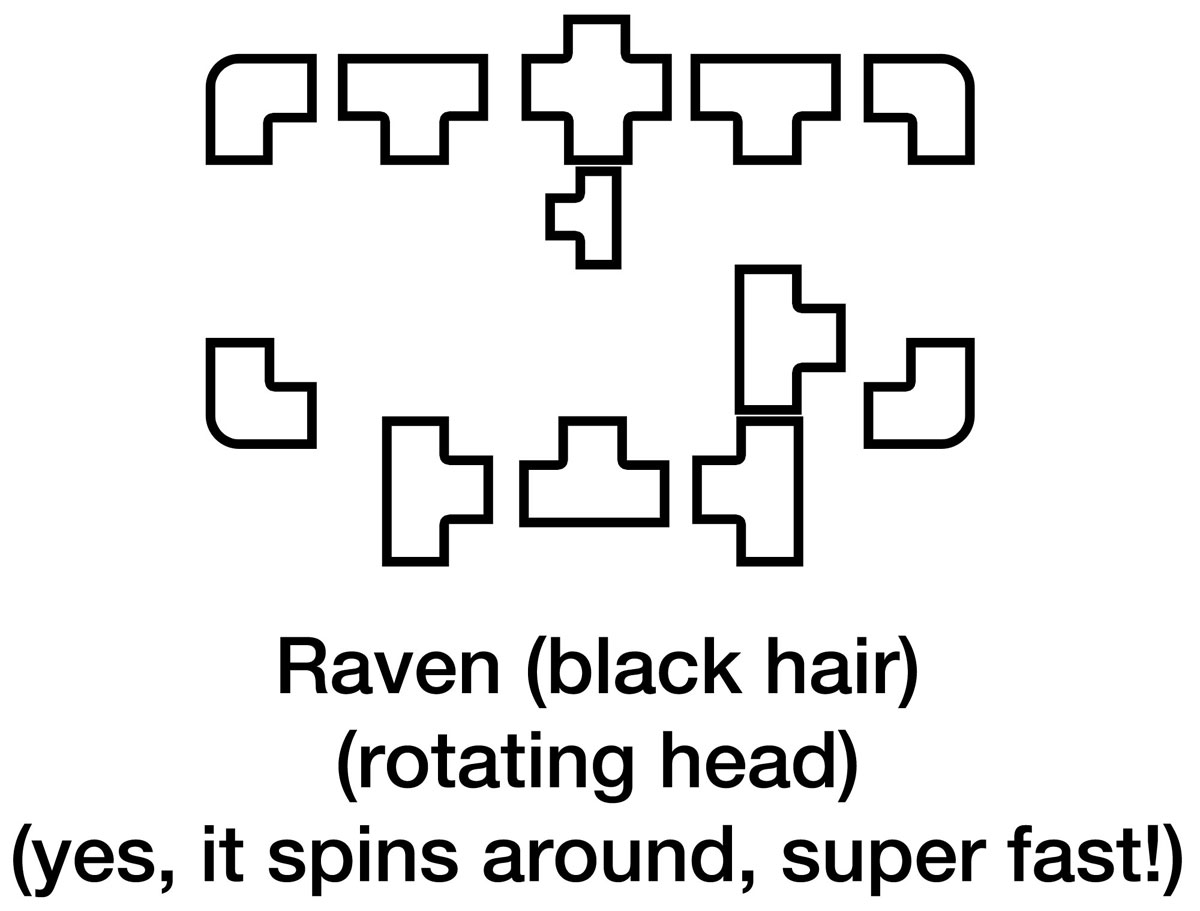
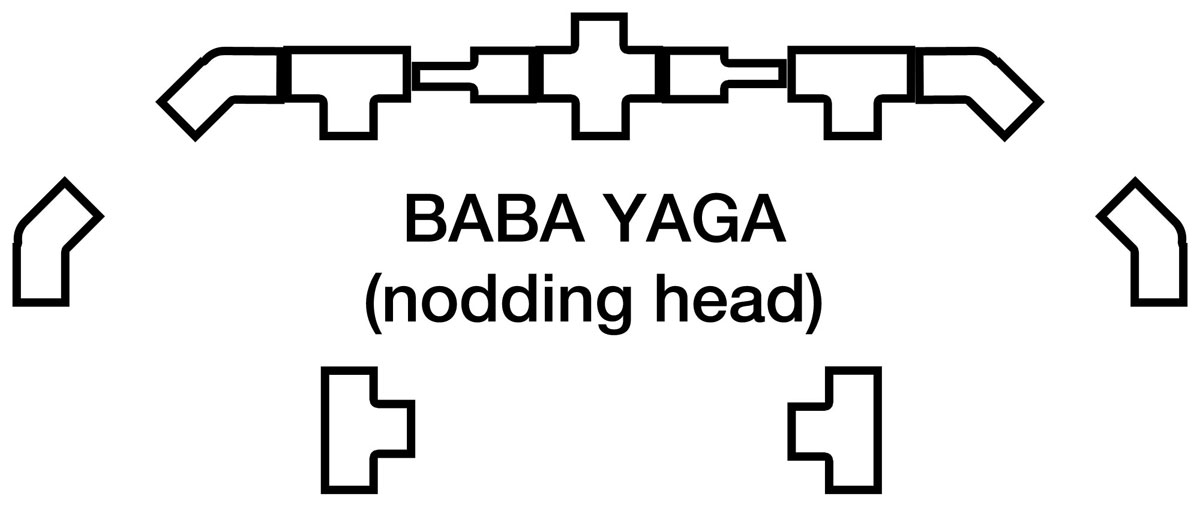
Create your skeletal structure for your prop using 3/4 inch PVC pipe for the main aspects and 1/2 inch PVC pipe for the moving parts. (See diagrams below, for reference)
Attach your deer motor to your PVC pipe(s) using a hyco bar and test out your creation(s).
Use chicken wire, or some other form of material, to create the "skin" shape of the body that will be clothed.
Put clothes onto your newly made props, insert rebar into the ground at the same distance apart of the "legs" and put your prop onto the rebar.
Plug it in, using an outdoor outlet and extension cord, and watch your newly made magic come to life.
Here are the diagrams that I created for this main project. The smaller sections and/or segments are 1/2 inch PVC pipe and the larger is 3/4 inch PVC pipe.


