Haunt at Great Oak
The haunt returns October 2025
The Nightmare figures can be purchased as-is in a "poseable" manner; however, they only really act like wind puppets with the arms being bendable. If you are curious how we made ours fully articulated and free-standing, then here's the description for you.
Materials
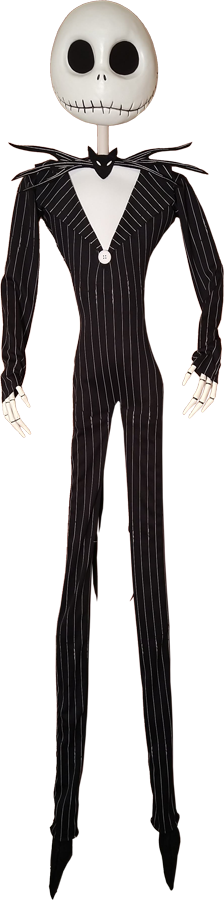
Jack - At least one is required*
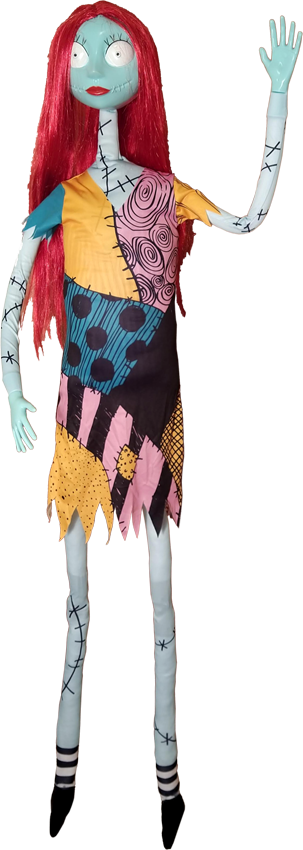
Sally - At least one is required*
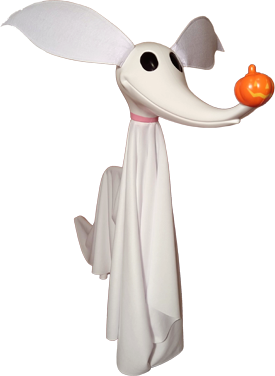
Zero - At least one is required*
1/2 inch PVC Pipe - Required
PVC Pipe tee connectors - Required for Jack and/or Sally
Hacksaw, or similar tool - Required
Screws, bolts and washers - Required for Jack and/or Sally, or if mounting to base
Rubber washers - Required if not enough resistance, see directions
Flange - Optional (to secure figure to a base)
PVC Adapter - Optional (to securely attach PVC pipe to flange)
Drill and assorted bits - Required
Heat gun - Required for Jack and/or Sally
Rubber mallet - Optional
Wire ties - Required
Hot glue gun - Optional, but highly recommended
Stuffing or Queen size pillow - Required for Jack and/or Sally
Black spray paint - Optional
Backdrop - Optional
Jack - At least one is required*
Sally - At least one is required*
Zero - At least one is required*
1/2 inch PVC Pipe - Required
PVC Pipe tee connectors - Required for Jack and/or Sally
Hacksaw, or similar tool - Required
Screws, bolts and washers - Required for Jack and/or Sally, or if mounting to base
Rubber washers - Required if not enough resistance, see directions
Flange - Optional (to secure figure to a base)
PVC Adapter - Optional (to securely attach PVC pipe to flange)
Drill and assorted bits - Required
Heat gun - Required for Jack and/or Sally
Rubber mallet - Optional
Wire ties - Required
Hot glue gun - Optional, but highly recommended
Stuffing or Queen size pillow - Required for Jack and/or Sally
Black spray paint - Optional
Backdrop - Optional
The video where we got the idea for and learned about using a heat gun on PVC pipe can be found at https://youtu.be/2WAaiOVWrAI. It is highly recommend to watch this before attempting to build Jack and/or Sally.
Jack and/or Sally... You will need to build legs, hips and a spine using the PVC pipe, tee connectors and screws with bolts and washers.
The PVC pipe will need to be cut to the appropriate length(s) for each section of the legs. Using the heat gun you can melt the ends of the PVC pipe together by squeezing it together with a pair of pliers. You should have a bucket of water nearby to place the hot pipe into for a quick cooling after using the heat gun to ensure that it remains how you want it. Using a drill, you can make the holes where you will be putting your screws, as long as the holes aren't too big in diameter. It is recommended to put a washer on the outside, two between the joints and another washer on the side with the bolt, or four washers in total. You can use a rubber mallet while working to ensure that all of your tee connector joints are in tight.
Once you have the required skeletal structure, you will want to drill a hole all the way through the top of the PVC pipe used for the spine, from the front to back. This is what will be used for attaching wire ties to the pre-existing wire.
Jack is easiest to insert the leg and spine build through the neck line of the prop. Just carefully pull on the glue that is currently there and it should separate on the back of his neck.
Sally will need to have the stitching for her legs removed from the inner portion of her body to apply the leg and spine build to the top.
Sally will need to have the stitching for her legs removed from the inner portion of her body to apply the leg and spine build to the top.
Once you have attached the spine to the bendable arms, you will want to add some stuffing to give them a more full appearance. Jack can be done using only stuffing in his torso with some hot glue to close things back up, whereas Sally is more easily done just by putting a pillow underneath her dress. Also, for Sally, you will want to pull her stockings up over the PVC pipe.
If you plan on using a flange, you should remove the shoes, cut out a small hole, add a little bit of stuffing and put that over the PVC adapter, prior to installing onto the flange.
If any part of the PVC pipe will be exposed, you can lightly sand the PVC pipe where you would like to spray paint it, to allow the paint to properly adhere to the PVC pipe, and give it enough of a coat that you cannot see the pipe's color through the paint.
Zero... please read the complete directions for Jack and Sally to get an idea and this project should be a snap if you've converted either of the other ones.